What is docker?
It seems a logical starting point to get an overview of what docker is. There are plenty of resources around to explain it better than I can like their official page so here I only offer my understanding of it.
Docker is a sort of light weight VM that makes it possible to run packaged up (containerised) applications on a host OS. It is based on Linux containers. Each image is a snapshot of a particular OS and any requirements one’s application may have in order to function. For example, a node web application may require, say, ubuntu, node, and nginx. All this isbe packaged up into an image which serves as a template from which containers (one or more) for this application can be created.
Containers can share the host OSs resources like CPU or files. The images used to create containers can be shared and run from any OS that also runs docker with confidence that when docker finishes setting up containers from an image, wherever it may be, the containers are identical.
All this confused me at first, which is why I needed a project to take on to understand it better (see later in this post). However, as I started to get it I found it helpful to think that docker is to application environments what git is to source code.
Main components and terminology
Docker is targeted at Linux environments but works on other OSes via a virtual machine. Docker runs a daeomn (I’ve also read it referred to as the engine) on the host OS to manage containers created from images. Because I run docker locally on OS X, I followed their intallation instructions, which essentially set up a lightweight Linux VM ontop of which docker is run. This is managed by a little app called boot2docker which takes care of managing the VM and the daemon.
One interacts with this daemon through a command line interface (CLI), which is conveniently called docker. This CLI allows one to query the daemon for a list of images and containers created from those images and do things like stop, start, kill, and remove them.
To get started, obviously one needs to obtain an image from which one or more containers can be created. I like to think of an image as a class in OOP and a container as an instance. Images can be created interactively through the CLI, but I found it easiest to follow and share Dockerfiles, which are simple scripts with certain commands understood by docker when setting up one’s image. This file can be shared freely to anything using docker and the resulting image will be identical wherever it is run.
Docker’s Github counterpart is the Dockerhub where one can increasingly find images for seemingly any application and environment under the sun - all free. Image repositories on docker typically link to Github accounts which contain little else other than a Dockerfile which when edited and updated on Github, trigger a Dockerhub rebuild of the image made instantly available. Smart.
Basic commands
I’m no docker expert and the documentation will outline far more than I understand and can list here. However, I found just a handful of commands allowed me to get what I wanted to get done with little effort, which I list below:
docker ps –all
Gives a list of running or stopped (--all makes sure the latter are shown as only the former are shown by default) containers based on images. Each container can have a name or an ID like 073ae462ed69.
docker images
Gives a list of images your daemon knows about from which you can create as many new containers as you like. Each image can have a name or an ID like 073ae462ed69.
docker rm <container ID or name>
Removes a container (remember the image is still there to re-crate it).
docker rmi <image ID or name>
Removes an image.
docker pull <dockerhub-username/image-name>
Equivalent to git cloning a repository to your local machine. This pulls an image from Dockerhub and feeds it to your local docker daemon to manage and create containers from on your request.
docker run
docker run --publish <IP of host OS (e.g. 127.0.0.1)>:<host OS port>:<container port> --name="a-name-for-this-container" --hostname="a-name-for-the-host-hosted-by-the-container" --interactive <dockerhub-username/image-name> <command to run>
This has the potential to be a long command. However, all it does (I say that flippantly) is run a container based on the image <dockerhub-username/image-name>. Once the image is set up the command (as in, what one would type into the terminal) in <command to run> will be executed. The container is given a name for your convenience with --name, which avoids the reliance on IDs that are hard for us humans to remember and it will also show when executing the docker ps --all command from above. The OS in the container will be given a hostname specified in hostname. The --publish option tells docker to map a host OS IP address and port to the container’s port. The --interactive option allows one to interact with the container once its up and running.
Here is an example of this command filled in:
docker run -p 192.168.59.103:49159:9000 --name="ufo-js-server" --hostname="ufo-js-server" -i coderigo/docker-ufo-js /bin/zsh
This will create a container named ufo-js-server which is based on the coderigo/docker-ufo-js image pulled from dockerhub. The container will be given a hostname of ufo-js-server (i.e. the terminal prompt will show ufo-js-server$ some command). Because this is meant to run on OS X, the docker VM exposes itself by default on IP address and port 192.168.59.103:49159, which is mapped to the container’s port 9000. Any application inside the container accessible through port 9000 will be accessible through the host by hitting 192.168.59.103:49159. Once the container is set up it will execute the /bin/zsh command for you, which will show a terminal prompt for you to start interacting with the container.
docker build
When cd-d into a directory with a Dockefile this will take the commands in the file and build an image from it. If one gives it a --tag="my-image-name" option it will give the image a nice human-readable name.
Example project
To see it all working I had a go at creating a docker image for the environment needed to run a browser-based p2p distributed system I read about in Introducing ufo.js: A browser-oriented p2p network, [Bevilacqua, A; Boemio, P.; Romano, S.P. in International Conference on Computing, Networking and Communications (ICNC), 2014 , pp.353,357, 3-6 Feb. 2014].
It essentially needs an OS (I chose Ubuntu), node, git, and a few other bits to run a web server. I created a Dockerfile and a github repository for it here, which implements a fork of the original repository..
The Dockerfile looks like this:
# Base image
FROM ubuntu:14.04

# Put my hand up as maintainer
MAINTAINER Rodrigo Martell <rodrigo.martell@gmail.com>

# Suppress debian frontend warnings from Ubuntu base image
RUN DEBIAN_FRONTEND=noninteractive

# Install OS tools we'll need
RUN \
    apt-get update && \
    apt-get -y install nodejs && \
    apt-get -y install npm && \
    apt-get -y install curl && \
    apt-get -y install vim && \
    apt-get -y install git && \
    apt-get -y install zsh

# Install OH-MY-ZSH to see pretty terminal and ditch the bash
RUN curl -L https://github.com/robbyrussell/oh-my-zsh/raw/master/tools/install.sh | bash

# Make symbolic link to "node" since code was written for OSX and linux refers to "node" as "nodejs"
RUN ln -s /usr/bin/nodejs /usr/bin/node

# Clone the ufo-js repository, install dependencies and make binaries
RUN \
    git clone https://github.com/coderigo/ufo.js-base.git /root/ufo.js-base && \
    cd /root/ufo.js-base && \
    npm install && \
    make compile

# Expose port 9000 (used by ufo-js)
EXPOSE 9000

# Set environment variables
ENV HOME /root

# Define working directory
WORKDIR /root

# Define default command
CMD ["/bin/zsh"]
It’s fairly self-explanatory. The top of the file tells it to install the OS based on an image for the ubuntu OS. It then encourages someone to take responsibility for the image (yours truly in this case) and runs its first command with the RUN keyword, which is not that interesting in this case.
The second RUN block uses apt to update packages before installing the required applications (node, npm, curl, vim, git, and zsh). Really, I didn’t need vim or the zsh but I chucked them in there for good measure as I was mostly playing around. The same goes with installing oh-my-zsh in the third RUN block.
The fourth RUN command creates a symbolic link in the container so that calling “node” from the command line translates to “nodejs” behind the scenes. This is because the app I was running was developed on OS X and on Linux node is called “nodejs” and on OS X it is called “node”.
The fifth RUN command, having all the application environment requirements fulfilled, clones the application repository into /root/ufo.js-base, changes directory into the cloned project and uses npm to instal its node dependencies and makes binaries as per the original repository’s instructions.
The application I wanted to run would start an express web server that would listen on port 9000. This port needs to be exposed to the outside of the container to be useful, which is done with the EXPOSE command before setting some environment variables and working directory when the container starts.
The last line of the script tells docker to run the command /bin/zsh (i.e. start the zshell) if no alternative command is given on container startup.
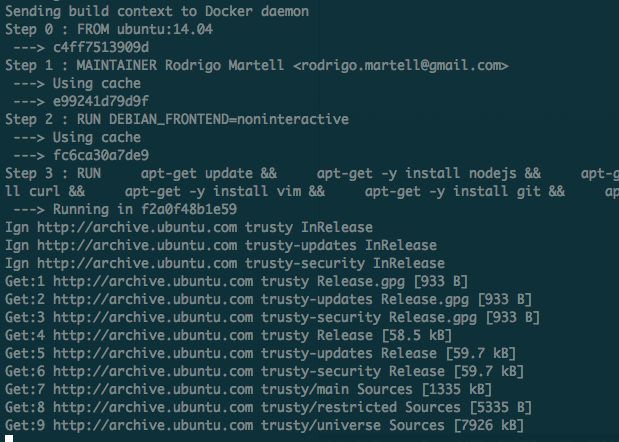
At this point the image isn’t quite a reality, it is just a text file with docker commands. To build the image one simply types:
docker build --tag="my-image" ./
This will show a whole bunch of output while the image is built and intermediate images are used:

Once it’s all done, one can check the image has been created and docker knows about it with:

Now, one can create a container based on that image with:
docker run -p 192.168.59.103:49159:9000 --name="my-image-container" --hostname="my-image-container" -i -t my-image
That will start a new interactive terminal session, into which one can run the application it hosts with:

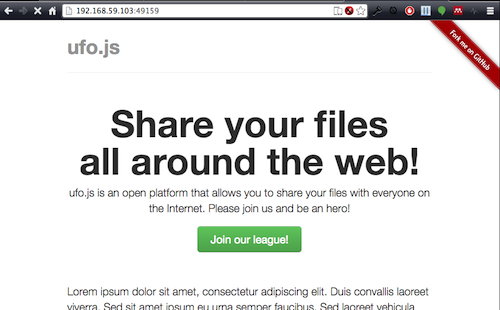
Now, one can travel (on OS X) to http:192.168.59.103:49159 and see the application load to verify that it’s all working.

Genius.
Closing bits
I excluded from this how to push one’s images to dockerhub and how to hook them up to re-build on commit to your Github repositories a la Travis and the like. The documentation is pretty darn good at that though so head there to check it out if that’s something you’re interested.
I’m pretty excited about docker and its uses. I’ve worked on past projects where something like this would have not only helped during development but during deployment of web applications. I’ve also recently seemlessly implemented a discourse instance using their recommended docker installation on a digital ocean VPS. It worked in minutes and all updates are managed by docker without issue.
I’m also pretty excited about docker’s potential role in helping ease the pain of reproducing published works as argued in this post. I plan on seriously considering its use in my own research. m I recently read about Kitematic, which looks like a Mac GUI-based way to manage and create docker images. I haven’t given it a whirl yet but plan to soon as it looks great.
There’s a whole lot more one can do with docker that I am yet to learn or need and there are some concerns about its security floating around too. I’m sure these will be attacked by the community as it gains popularity. In the meantime I’m very impressed with how easy it makes it for the common tinkerer like me to containerise environments and share them and I look forward to using it on more of my projects.